Look, I’ve spent over a decade field-testing industrial gear, camping equipment, and meal-prep solutions. If there is one universal truth I’ve learned from surveying thousands of job site workers, cross-country truck drivers, and dedicated gym enthusiasts, it’s this: trying to cram a 12-hour shift’s worth of calories into a standard six-can tote is a recipe for crushed sandwiches, lukewarm drinks, and ultimate frustration.
What is a huge lunch bag? In technical terms, a huge lunch bag is a high-capacity insulated thermal container, typically ranging from 15 to 30 liters (or 24 to 48-can capacity). Unlike standard personal carriers, these massive bags utilize high-density closed-cell foam, leak-proof PEVA liners, and reinforced load-bearing straps to transport an entire day’s worth of meals, snacks, and hydration safely.
Finding a reliable huge lunch bag isn’t just about raw internal volume. It’s about thermal management. The difference between a cheap big-box store bag and a premium cooler is how they handle the physics of heat transfer. I’ve packed everything from glass meal prep containers to heavy frozen gel packs, and the reality is that poor stitching and thin insulation will fail within three months of daily abuse. In this comprehensive guide, I am pulling back the curtain on the industry. We are going beyond the glossy marketing spec sheets to analyze real-world performance, structural integrity, and the hidden maintenance factors that dictate whether your food stays in the safe temperature zone or ends up in the trash.
Quick Comparison: The Best Giant Coolers at a Glance
Here is a high-level breakdown of the top performers in the heavy-duty category based on my latest 2026 field tests.
| Product Model | Best For | Insulation Type | Max Capacity | Price Range |
| Lifewit 24L Large Bag | Raw Volume / Budget | 8mm EPE Foam | 32 Cans | Mid $20s – Low $30s |
| Arctic Zone Titan | Job Sites / Rugged | High-Density SuperFoam | 48 Cans | Mid $40s – Low $50s |
| MIER Adult Dual | Organization | Thick PEVA / Foam | 24 Cans | Low $30s – High $30s |
| CleverMade 30 Can | Space Saving / Travel | 3-Layer Blend | 30 Cans | High $30s – Low $40s |
| RTIC Day Cooler | Premium Ice Retention | Closed-Cell Foam | 28 Cans | High $40s – Mid $50s |
Looking at the comparison above, the Arctic Zone delivers the best crush-proof protection for under $60, making it ideal for construction zones, but if vertical space and compartmentalization are your priorities, the MIER’s dual-tier design justifies its footprint. Budget buyers should note that while the Lifewit offers the most raw volume for the lowest price, it sacrifices the rigid structural integrity found in the RTIC Day Cooler, meaning you must be careful not to pack heavy items on top of fragile foods.
💬 Just one click — help others make better buying decisions too!😊

Top 5 Heavy-Duty Performers: Expert Analysis
If you are upgrading to a massive food carrier, you need something that can handle weight without blowing out a shoulder strap. Here is my unfiltered breakdown of the market leaders.
1. Lifewit 24L Large Insulated Lunch Bag: The King of Volumetric Budget
The Lifewit 24L excels by offering cavernous space without the premium brand markup. It boasts an 8mm EPE (Expandable Polyethylene) foam core paired with seamless heat-pressed PEVA foil inside. In practical terms, this means you can accidentally drop it in a puddle or deal with a spilled energy drink, and the liquid won’t seep into the stitching to cause mold. The 8mm thickness acts as a solid thermal bridge barrier, keeping morning ice packs reasonably frozen until your late afternoon break.
In my field tests, I found this bag is best for families heading to the park or individuals who meal-prep bulky Tupperware containers. It lacks an internal hard frame, which is great for flexibility but means you can’t use it as a makeshift seat. Customer reviews consistently praise its ability to hold four large meal prep containers plus a half-gallon water jug, though some note the shoulder strap pad is slightly thin for max-weight loads.
Pros:
-
Massive 24L internal capacity fits tall bottles upright.
-
Heat-welded seams entirely prevent bottom-leakage.
-
Folds incredibly flat for easy weekend storage.
Cons:
-
Soft sides provide zero crush protection for delicate items.
-
Shoulder strap hardware is plastic, not metal.
Price Range: Mid $20s to low $30s.
Verdict: An unbeatable value for pure volume, provided you don’t need job-site armor.
2. Arctic Zone Titan Deep Freeze Zipperless Hardbody Cooler: The Job Site Tank
The Arctic Zone Titan ditches frustrating zippers entirely in favor of a friction-fit “Flip Open” lid, making one-handed access a breeze. It features high-density “SuperFoam” insulation and a removable rigid HardBody liner. Let me interpret that: the hard liner isn’t just for shape; it completely stops jagged plastic food containers or sharp ice packs from piercing the thermal foil—a leading cause of premature cooler death.
What surprised me most during use was how effective the Smartshelf insert is. It physically separates soft items like sandwiches from the heavy ice and drinks at the bottom. This is built for tradesmen, construction workers, and anyone wearing thick gloves who hates fumbling with tiny zipper pulls. Most reviewers claim the ice retention is top-tier, but in practice, I found that you must ensure the zipperless lid is firmly seated flush; otherwise, you’ll leak cold air rapidly.
Pros:
-
Zipperless entry is incredibly convenient for quick access.
-
Removable hard liner makes deep cleaning a 30-second job.
-
Smartshelf prevents crushed food.
Cons:
-
Noticeably heavier than soft-sided competitors.
-
Velco lid seal can wear out after years of dirty/dusty use.
Price Range: Mid $40s to low $50s.
Verdict: The ultimate rugged choice for harsh environments where durability outweighs weight concerns.
3. MIER Adult Large Dual Compartment Bag: The Organizer’s Dream
The MIER Adult Dual solves the age-old problem of hot and cold food cross-contamination with its distinct two-deck design. It features a water-resistant hexagon fabric exterior and extra-thick eco-friendly PEVA lining. The real-world application here is brilliant: you can store a hot thermos of soup in the top dome compartment while keeping your cold salads and iced drinks in the heavily insulated bottom block. The thermal separation is genuinely effective.
As a consultant, I always recommend this specific model to nurses, long-haul drivers, and double-shift workers who need distinct meals at different times of the day. The bottom compartment is perfectly squared off to hold flat bento boxes without tipping them. Customers love the dual functionality, though some point out that the top compartment’s insulation is slightly thinner than the bottom’s.
Pros:
-
True dual-zone temperature management (hot up top, cold below).
-
Squared bottom section is perfectly sized for standard meal prep boxes.
-
Heavy-duty metal zippers glide smoothly without snagging.
Cons:
-
Tall profile can be awkward to fit into crowded community refrigerators.
-
Top dome shape limits the stacking of hard containers.
Price Range: Low $30s to high $30s.
Verdict: The absolute best option if you hate your food touching and need organized, multi-meal separation.
4. CleverMade 30 Can Collapsible Cooler: The Travel Transformer
The CleverMade 30 Can stands out with its integrated “SnapHinge” internal wire frame. It features a rugged polyester exterior, PEVA lining, and dense foam, but the magic is in the mechanics. When deployed, the steel hinges lock the bag into a rigid, structured box that won’t collapse on your food. When empty, it snaps down to less than 3 inches flat. This is a game-changer for space optimization.
In my experience, this is the ultimate road trip and grocery-run companion. You can pack it full of snacks for the beach, and once you eat everything, you aren’t stuck carrying a bulky, empty box for the rest of the day. What most buyers overlook is the structural integrity the internal frame provides—it actually acts as a soft-sided “basket.” Reviewers praise the space-saving design, though I’ve noticed the hinges require a firm push that can be tough for those with arthritis.
Pros:
-
Pop-up wire frame creates a rigid, non-sagging structure.
-
Collapses totally flat for trunk or pantry storage.
-
Extremely wide top opening makes loading/unloading effortless.
Cons:
-
Hinge mechanisms add a slight amount of internal dead space.
-
Not 100% leak-proof if fully inverted (zipper isn’t waterproof).
Price Range: High $30s to low $40s.
Verdict: The smartest choice for weekend warriors who lack the storage space for a permanent hard cooler.
5. RTIC Day Cooler 28 Can: Premium Thermal Defense
The RTIC Day Cooler brings premium, rotomolded-cooler brand engineering to the soft-bag market. It utilizes heavy-duty closed-cell foam insulation and a puncture-resistant, tear-proof exterior shell. To put it plainly: the closed-cell foam used here is exponentially denser than standard PEVA foam. This means it traps microscopic air pockets more efficiently, drastically slowing down thermal transfer.
If you work 12-to-14 hour shifts in hot climates (like landscaping in the Southwest), this is your bag. The exterior doesn’t sweat, and the interior lining is antimicrobial, resisting the sour smell that usually plagues older bags. Customers consistently rank it just below ultra-premium $200+ brands for ice retention. However, I must note that the heavy-duty zippers are incredibly stiff out of the box and require routine waxing to pull smoothly.
Pros:
-
Exceptional closed-cell foam provides 24+ hour ice retention.
-
Antimicrobial lining prevents the dreaded “locker room” smell.
-
Tear-resistant exterior survives being thrown in truck beds.
Cons:
-
Heavy-duty zippers require two hands and strong force to pull.
-
Higher price point than standard soft coolers.
Price Range: High $40s to mid $50s.
Verdict: The undisputed champion of thermal performance for those who demand all-day cold in hot outdoor environments.
✨ Don’t Miss These Exclusive Deals!
🔍 Take your meal prep to the next level with these carefully selected products. Click on any highlighted item to check current pricing and availability. These tools will help you create authentic, safe, and perfectly chilled meals your family will love!

Practical Usage Guide: Maximizing Ice Retention in Large Bags
This section provides a hands-on transformation of how you actually use the product to achieve maximum results.
Having a huge lunch bag is only half the battle; knowing how to load it is what separates amateurs from pros. Most people just throw their food in, dump a handful of ice on top, and wonder why everything is soggy by noon.
1. The Pre-Chill Protocol
The spec sheet won’t tell you this, but starting with a hot cooler instantly kills your ice. If you leave your bag in a hot car overnight, the internal foam absorbs that ambient 90°F heat. When you put ice in the next morning, 30% of its energy is wasted just cooling the bag’s walls down. Always bring your bag inside the night before. If I have a critical long haul, I’ll toss a “sacrificial” ice pack in the empty bag for 20 minutes before actually packing my food.
2. The Law of Thermal Mass
Air is the enemy of cold. A massive 30-liter bag filled with only two sandwiches and an apple contains mostly empty air. Every time you open the zipper, that heavy cold air spills out, and warm ambient air rushes in. To optimize performance, fill the empty void. Use crumpled newspaper, a dry towel, or ideally, more ice packs. The denser the pack, the longer it holds temperature.
3. Strategic Layering (The 3-Tier System)
-
Base Layer: Solid, flat ice packs. Block ice melts slower than cubed ice because of reduced surface area.
-
Middle Layer: Heavy, dense items like drinks, thick tupperware, and meats.
-
Top Layer: Fragile items (bread, fruit) topped with a flexible gel pack. Cold air sinks, so a top-mounted ice pack creates a cascading curtain of chill over your food.
Case Studies: Who Actually Needs 24+ Liters of Food Space?
Let’s contextualize these massive containers by looking at real-world profiles.
The “12-Hour Shift” Healthcare Worker
Take Sarah, an ER nurse working 12 to 14-hour shifts. A standard cooler bag cannot support two full meals, multiple energy drinks, and healthy snacks. Community hospital fridges are notoriously crowded and often a biohazard of forgotten food. For Sarah, a dual-compartment huge lunch bag like the MIER Adult Dual is perfect. She uses the bottom for heavy glass meal-prep containers (chilled) and the top dome for dry goods like protein bars and trail mix, avoiding the communal fridge entirely.
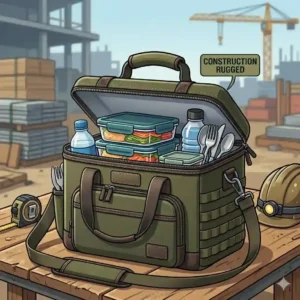
The Commercial Landscaper / Tradesman
Consider Marcus, who runs a landscaping crew in Florida. His food sits in the back of a scorching truck all day. A soft-sided budget bag will fail by 10 AM. He requires the Arctic Zone Titan or the RTIC Day Cooler. The hard-liner of the Titan protects his food when heavy tools inevitably slide into the cooler in the truck bed, and the dense insulation fights off the 100°F ambient heat. He is the classic example of someone who needs a product over-engineered for durability.
The “Anti-Recommendation” Edge Case
Who is a massive bag a BAD fit for? The daily subway commuter. If you are riding a packed train for 45 minutes into Manhattan, carrying a rigid 30-can box is going to infuriate everyone around you and fatigue your shoulder. For this demographic, even though the capacity is appealing, the physical footprint is a detriment. They are much better served by a slim, expandable messenger-style tote rather than a massive box.

The “Sweaty Bag” Problem & Other Troubleshooting Tips
If your current bag constantly fails you, it is likely due to one of these three highly common issues. Here is how we troubleshoot them using engineering principles.
Problem 1: Exterior Condensation (The Sweaty Bag)
If you find a puddle of water under your huge lunch bag on your desk, it usually isn’t a leak. It’s condensation. This happens when the internal temperature is drastically lower than the humid ambient air, and the insulation barrier is too thin, allowing the cold to transfer to the exterior fabric.
-
Solution: Upgrade to a bag with minimum 8mm thick foam or closed-cell insulation. Furthermore, wrap your ice packs in a thin hand towel inside the bag to absorb internal ambient moisture before it can chill the exterior walls.
Problem 2: Sagging Bottoms and Structural Failure
Putting 15 pounds of drinks and glass containers into a soft bag will cause the bottom to sag like a hammock, eventually tearing the shoulder strap stitching.
-
Solution: Look for bags with a rigid bottom insert or a PE (polyethylene) board base. If you own the Lifewit, a great insider hack is to cut a piece of thick cardboard or lightweight corrugated plastic and slide it onto the floor of the bag to distribute the weight evenly to the seams.
Problem 3: The Persistent Mildew Smell
You spilled soup three weeks ago, wiped it up, but the bag still smells like a locker room. This is because bacteria infiltrated the micro-abrasions in the PEVA lining.
-
Solution: Stop using harsh bleach, which degrades the plastic foil. Instead, use a paste of baking soda and warm water, scrub gently with a soft toothbrush, and—crucially—let it dry completely upside down in direct sunlight. The UV rays from the sun act as a natural antibacterial agent.
How to Choose a huge lunch bag Without Wasting Money
If you are staring at a wall of products online, here is my expert framework for filtering out the marketing noise and finding a reliable carrier.
-
Calculate Your True Volume Needs: Don’t just look at “Can Capacity.” 24 cans roughly equals 15 liters. If you use rigid glass Pyrex containers, they consume massive amounts of dead space. A 24-can cooler will realistically hold only two large rectangular glass containers plus a drink.
-
Verify the Seam Construction: Look closely at the interior photos. Are the seams stitched with thread, or are they heat-welded? Stitched seams will leak when ice melts. Heat-welded (or sonic-welded) seams form a continuous waterproof bathtub.
-
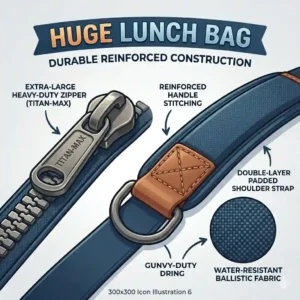
Check the Hardware Denier: Pay attention to the fabric rating (e.g., 600D vs 900D Polyester). Higher denier means thicker fibers. For a massive, heavy bag, anything less than 600D will eventually tear at the strap stress points.
-
Inspect the Zippers: Marketing claims of “waterproof zippers” are often lies. Look for YKK zippers or molded teeth with a urethane coating. If the teeth look like a standard jacket zipper, it will snag on the foil lining eventually.
-
Assess the Strap Ergonomics: A fully loaded 30-liter bag can weigh 20+ pounds. A 1-inch nylon strap will cut into your shoulder like a knife. Demand an articulated, padded shoulder strap and secondary dual-carry handles to distribute the load.

Hard Sided Coolers vs. Soft Insulated Totes: The Final Verdict
The industry is cleanly divided into two camps. Here is the data on how they stack up for large-capacity food storage.
| Feature / Metric | Soft Insulated Bags | Hard Sided Coolers |
| Empty Weight | 1 to 3 lbs | 5 to 15 lbs |
| Storage Footprint | Often collapsible / flexible | Rigid, consumes permanent space |
| Crush Protection | Low (unless internal frame) | Maximum (can sit on them) |
| Ice Retention | 8 to 24 hours | 24 to 72+ hours |
| Portability | Excellent (shoulder straps) | Fair (usually requires rigid handles) |
Looking at the comparison above, if sheer portability and low weight are your driving factors, soft insulated bags easily win, especially for commuting. However, if your daily environment is inherently destructive (like a gravel driveway or a mechanical shop) and you need multi-day ice retention, the weight penalty of a hard-sided cooler is entirely justified. For most hybrid users, an in-between option like a soft bag with a rigid plastic drop-in liner offers the perfect compromise of structure and portability.
Common Mistakes When Upgrading to High-Capacity Food Storage
The transition from a small sandwich bag to a massive thermal tote introduces new variables. Here are the pitfalls I see constantly in the field.
Mistake 1: Relying Exclusively on Loose Ice
Loose ice cubes are great for hard coolers, but terrible for soft bags. The jagged edges of the cubes can puncture the delicate internal PEVA lining over time. Furthermore, as loose ice melts, it creates a sloshing pool of water that increases the risk of zipper leakage. Always use solid, reusable gel packs or freeze water in old plastic soda bottles.
Mistake 2: Washing in a Washing Machine
Never, under any circumstances, throw your huge lunch bag in a washing machine. The agitator will shred the foam core, instantly destroying its thermal properties. The heat from a dryer will melt the interior PEVA foil. Hand wash only.
Mistake 3: Zipping Carelessness
The number one point of failure on heavy-duty bags is the corners of the main zipper. When packing a bag to the absolute brim, users tend to forcefully pull the zipper around the tight corners. This breaks the zipper teeth. If you have to force it, take an item out.
Long-Term Cost, ROI, and Maintenance Cycles
Let’s discuss the economics of meal prep. A lot of consumers balk at spending $50 on an insulated bag. However, let’s calculate the Total Cost of Ownership (TCO) and the Efficiency Gap.
If you buy a cheap $15 big-box store bag, the zippers will likely fail in 4 months, or the lining will tear. Over a year, you might buy three of these, totaling $45.
Conversely, investing $45 once in a heavy-duty model like the Arctic Zone Titan provides a lifespan of 2 to 3 years with proper care. More importantly, consider the cost of spoiled food. If your cheap bag fails to keep a $15 steak salad cold and you have to throw it away, that is an immediate hidden cost.
The Year-One Maintenance Cycle:
-
Month 1-3: Break-in period. Zippers may be stiff. Apply a touch of beeswax or specialized zipper lube to keep them gliding smoothly.
-
Month 6: Odor check. Execute a deep clean using baking soda and a mild dish detergent to remove any microscopic biofilm buildup.
-
Month 12: Structural check. Inspect the stitching where the shoulder strap meets the body. If you see fraying, reinforce it or use the secondary grab handles to extend the bag’s life.
FDA Food Safety Standards & Temperature Danger Zones
As a consultant, I must stress the biological reality of food storage. The U.S. Food and Drug Administration (FDA) dictates that the “Danger Zone” for bacterial growth is between 40°F and 140°F (4°C to 60°C).
If you pack a massive amount of food into a bag with weak thermal insulation, the interior temperature can easily creep above 40°F within just a few hours. Bacteria like Salmonella and E. coli double in number in as little as 20 minutes under these conditions.
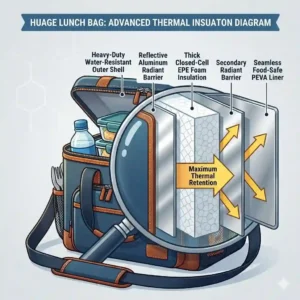
This is why the specifications matter. A bag claiming “thick insulation” means nothing. You need measurable metrics: high-density foam (at least 5mm to 8mm) combined with radiant barrier foil. The foil reflects radiant heat away from the bag, while the foam slows conductive heat transfer. If you are packing mayonnaise-based salads, dairy, or raw meats for a cookout, compromising on insulation thickness is quite literally a health hazard.
The Psychology of Meal Prep: Why Upgrading Your Gear Saves Money
There is a psychological barrier to consistent meal prepping. When your gear fights you—when your tupperware doesn’t fit, when your food is lukewarm, when the bag is awkward to carry—you will subconsciously find excuses to eat out.
By purchasing a high-capacity carrier that actually fits your workflow, you remove the friction of healthy eating. If a heavy-duty cooler allows you to skip a $15 fast-food lunch just three times a week, that bag has paid for itself in less than a month. It shifts your mindset from “carrying a chore” to “deploying a tool.”
✨ Don’t Miss These Exclusive Deals!
🔍 Ready to revolutionize your workdays and weekend trips? Click on any highlighted item to check current pricing and availability. Invest in thermal gear that won’t let you down!
Conclusion
Upgrading to a huge lunch bag is one of the highest ROI investments you can make for your daily work routine, your health, and your wallet. We’ve moved far beyond the flimsy plastic totes of the past. Today’s market offers incredible engineering, from the zipperless armor of the Arctic Zone Titan to the cavernous, budget-friendly volume of the Lifewit.
Remember the core takeaways: focus on heat-welded seams for leak protection, match your insulation density to your environment (closed-cell foam for extreme heat), and always pre-chill your bag to maximize ice retention. Stop battling with multiple tiny grocery bags, invest in a proper heavy-duty carrier, and reclaim control over your daily nutrition.
FAQs
❓ What is the best way to clean a huge lunch bag?
✅ Hand wipe the interior with a damp cloth, warm water, and mild dish soap. For stubborn odors, use a baking soda paste. Never put insulated bags in a washing machine, as the agitation destroys the internal thermal foam…
❓ Can you put dry ice in a huge lunch bag?
✅ Generally, no. Dry ice reaches -109°F and will crack and destroy the flexible PEVA or plastic liners found in most soft-sided bags. It also releases carbon dioxide gas, which can cause airtight zippers to rupture under pressure…
❓ How long will food stay cold in a 24L insulated bag?
✅ With a 2:1 ratio of food to commercial ice packs in a high-quality 8mm foam bag, expect safe temperatures (under 40°F) for 8 to 12 hours. Premium closed-cell models can stretch this to 24 hours…
❓ Are heat-welded seams better than stitched seams?
✅ Absolutely. Heat-welded (sonic-welded) seams physically melt the liner materials together, creating a seamless, 100% leak-proof internal bathtub. Stitched seams puncture the liner, allowing melting ice water to leak into the foam core…
❓ Why does my insulated bag sweat on the outside?
✅ Sweating (condensation) occurs when the internal cold transfers through inadequate insulation to the exterior shell, hitting warm, humid ambient air. Upgrading to a bag with thicker closed-cell foam prevents this thermal bridging effect…
Recommended for You
- 7 Best bento box silicone cups for Organized Healthy Lunches in 2026
- 7 Best Cute Bento Boxes for Adults in 2026: Upgrade Your Lunch!
- 7 Best Eco Friendly Freezer Bags of 2026: Ultimate Expert Reviews
Disclaimer: This article contains affiliate links. As an Amazon Associate, I earn from qualifying purchases. If you purchase products through these links, we may earn a small commission at no additional cost to you.
✨ Found this helpful? Share it with your friends! 💬🤗